
A look at YouTube 4K Live Streaming
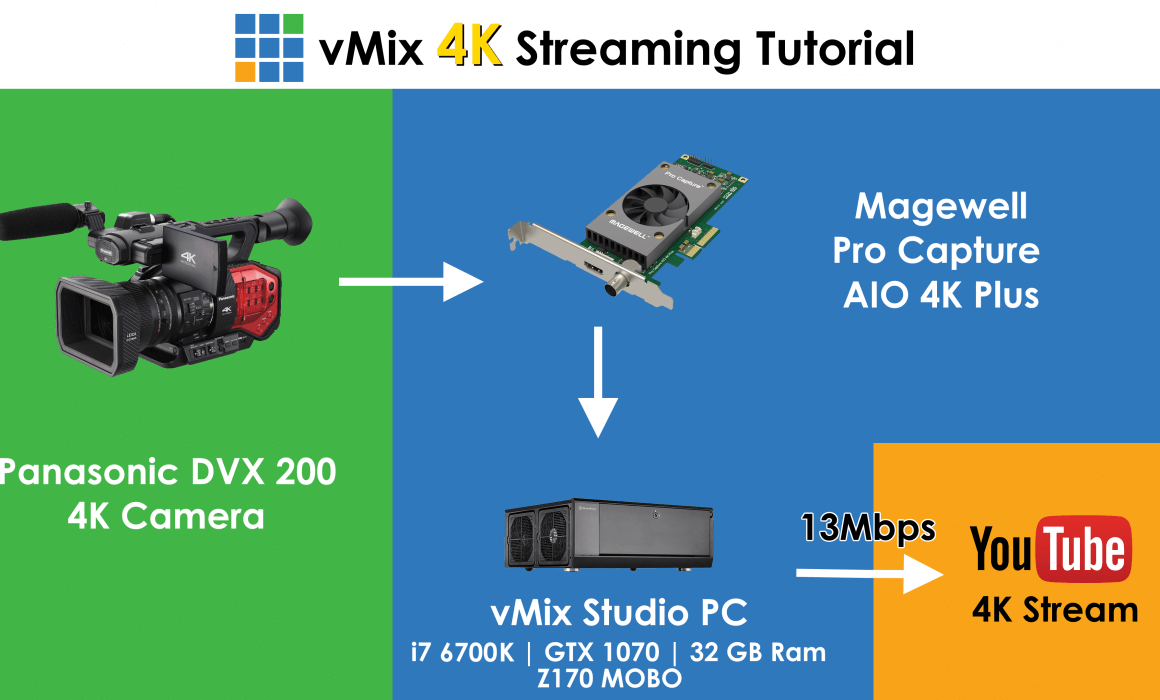
After testing out the YouTube 4K Live Streaming last month, we thought we would try it out by doing a live 4K tutorial! Tutorials are hard enough to make when they aren’t live so this live tutorial took a few goes to get everything right but we got there in the end. Here’s a quick look at what we used and how we made our 4K live stream.
4K Bandwidth
Firstly, 4K video requires A LARGE AMOUNT of bandwidth! As a result we had to factor in the amount of bandwidth we would need from our office connection in order to stream in 4K. We streamed to YouTube at 13Mbps and our office upload speed is only 20Mbps, so it didn’t leave a huge amount of head room. That meant we needed to make the tutorial after hours or on the weekend so no one else was consuming our precious bandwidth! Bandwidth was our main concern for 4K live streaming as YouTube recommends 13-30Mbps! Ideally we’d love to have a fibre connection and be able to stream in 4K without any worries! Maybe one day…
4K Camera
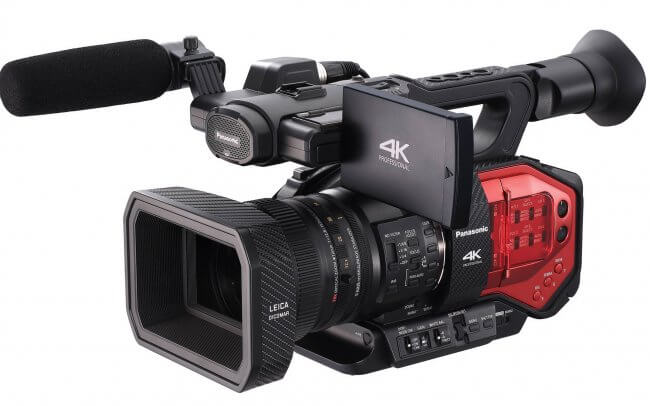
Thankfully we’ve dabbled in 4K production before so we had the necessary hardware to pull off a simple 4K production. This started out with a great Panasonic camera- the DVX 250. This allowed us to send out a 4K HDMI signal to be used as the single camera in our live production.
4K Capture Card
For our video capture we chose the Magewell Pro Capture AIO 4K Plus. This PCIe capture card allowed us to ingest the 3840×2160 video from the Panasonic camera via HDMI and into our Studio PC. We had to do a number of takes so we were using the card for quite some time and it worked flawlessly. Unfortunately I grabbed the wrong image for use in the video, this is what it actually looks like-

Production PC
In our office we have a Studio PC that we use for all of our vMix Fun Time Live Shows and for some vMix tutorials. This is a fairly powerful PC that allows us to do our large HD productions without any problems. We used the same PC for our 4K live tutorial and it worked well. It typically sat at 4% vMix CPU and 6-10ms rendering time. We were doing all of the production and streaming with the computer. We didn’t need to record as we were going for the live effect and used the live YouTube archive as our tutorial. 4K live video production is very resource intensive as it’s literally 4x the size of HD. You need to keep that in mind whenever your preparing for a 4K production.
Here’s our Studio PC specs-
- i7 6700K
- Asus GTX 1070
- 32 GB Ram
- Z170 MoBo
- Windows 10
- vMix 18 PRO
Part of the fun of 4K is making all of your production assets 4X the size you normally would with HD. I had to go and find 4K stock video footage to create a intro video. Surprisingly there isn’t as much 4K video footage to choose from compared to HD! Then I realised all of the setup images and screen shots would need to be 4K as well! And then of course 4K titles! Once I had all of my assets created it was just a matter of putting it all together in vMix….which was the easy part. The BEST thing about 4K production is that it’s the same as doing any other vMix production just the resolution changes. Instead of using 1920×1080 29.97, we changed to using 3840×2160 29.97. I added all of my videos, slideshows, title and camera just like I normally would for a HD production!
How to stream to YouTube in 4K!
I kept this live 4K tutorial nice and simple and was easily able to produce and stream the production in 4k with vMix. As technology and internet advances I can see 4K live streaming becoming more and more commonplace. We were easily able to stream a 4K production to YouTube for free and have it transcoded live! That’s pretty impressive. I guess 8K will be just around the corner….right??
vMix support 4K production in vMix 4K and vMix PRO editions, for more info check our website here.
Here is the video in glorious 4K!
Free 60 day trial of vMix with no watermarks!