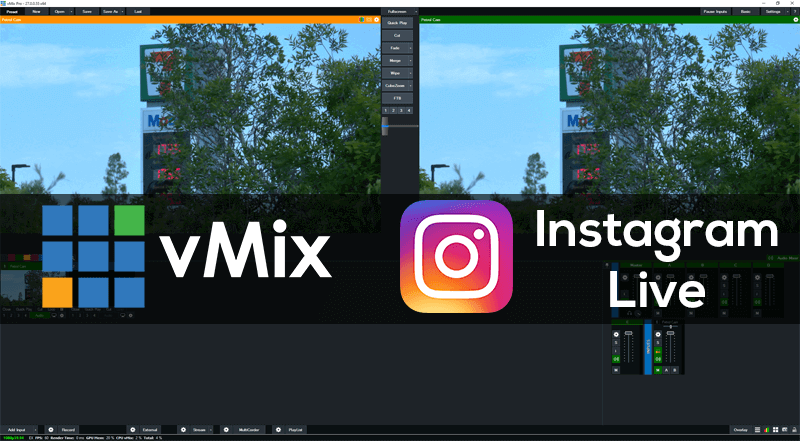
How to stream to Instagram Live with vMix
As of the 14th of December 2023, all Professional Instagram accounts now have access to stream via streaming software like vMix! That means you can now officially stream to Instagram directly from vMix. You don’t have to worry about 3rd party applications or work-arounds, just create a stream on Instagram Live and enter your details into vMix.
What Instagram account do you need to have in order to stream using software on your computer?
You will need a Professional account to use Instagram Live and vMix. You can change your existing account to Professional by doing the following-
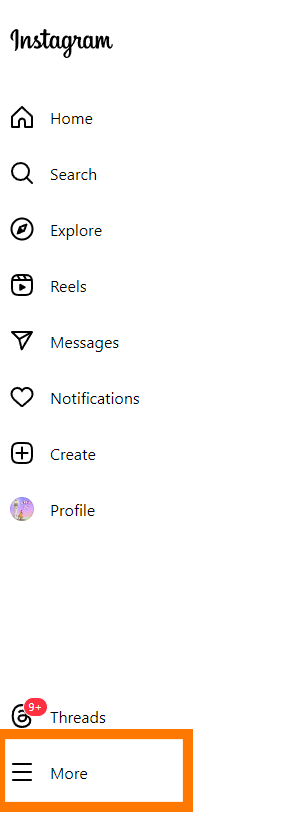
1. Go to Instagram.com and log in.
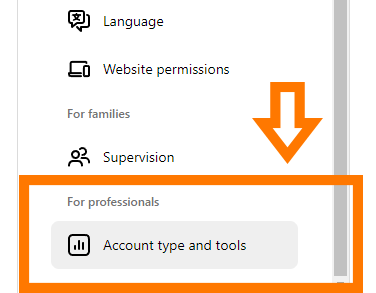
2. Click More and then Settings. These are in the bottom left of the screen.
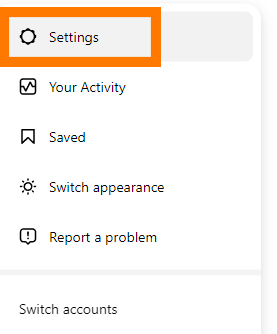
3. Then select Account type and tools
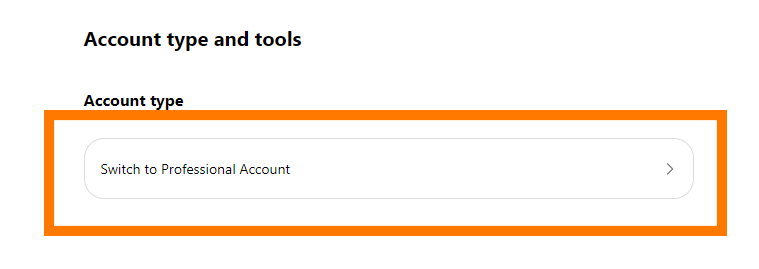
4. Then select Switch to professional account.
5. Then you’ll need to agree to the new account conditions and complete the application.
Once completed you’ll then be able to live stream to Instagram Live.
Here are some of the recommended specs for Instagram Live-
Video format
- 9×16 aspect ratio (recommended but not required)
- 720p @ 30 fps (note: 30 fps is recommended, but Live Producer can also support 60 fps if desired. When using 60 fps, the Live Producer preview screen will still display 30 fps. This is normal and we are currently investigating how to correct this.)
- Resolution: 720×1280
- Video bitrate range: 2,250–6,000 Kbps
- Alternatives (supported but not recommended): 480p @ 30 fps, 360p
https://about.instagram.com/blog/tips-and-tricks/instagram-live-producer
How do you live stream to Instagram Live?
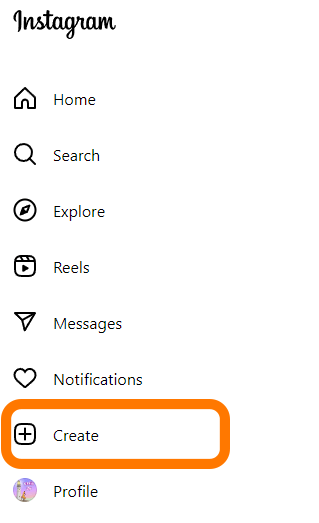
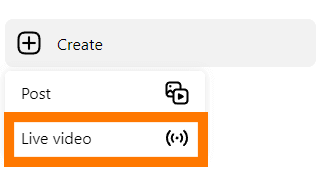
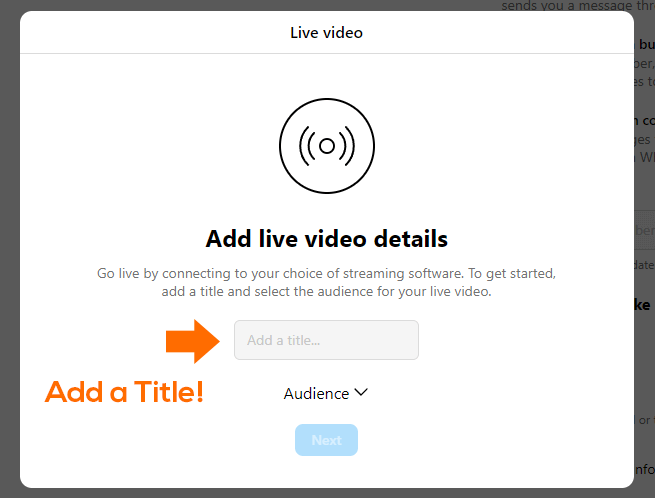
1. Firstly, you need to click on Create and then select Live Video
2. Give your stream a title
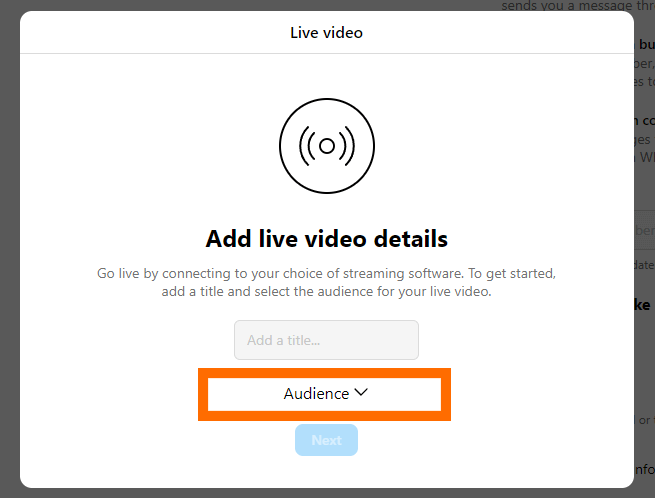
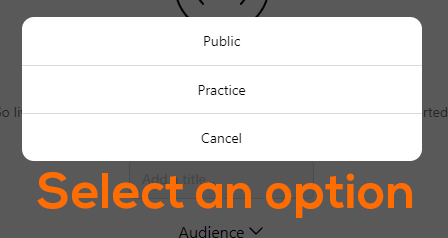
3. Then choose an audience. You can select Practice so that only YOU can see it OR Public so everyone can see it.
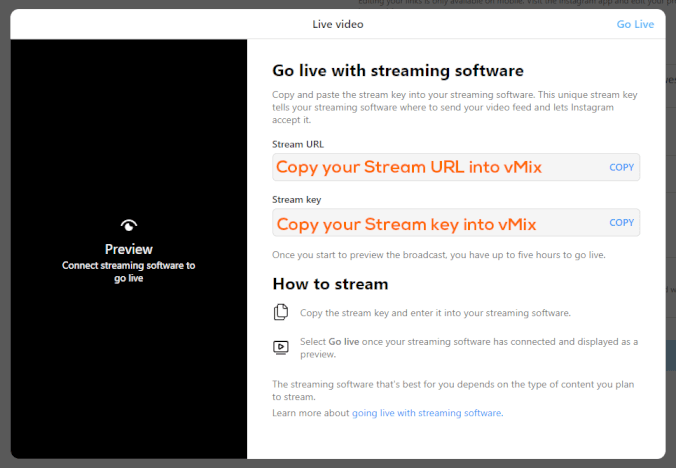
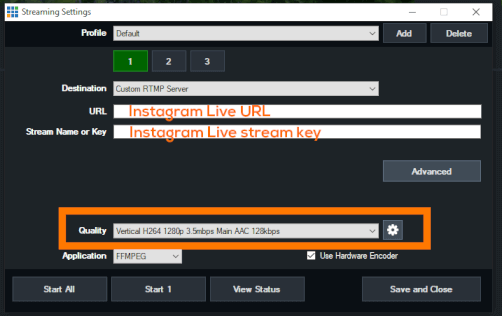
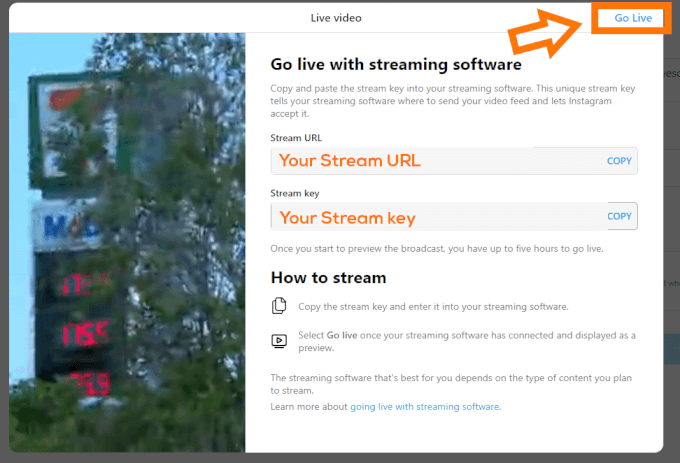
4. Then copy your Stream URL and Stream key into your vMix Streaming Settings.
Now we’re in vMix!
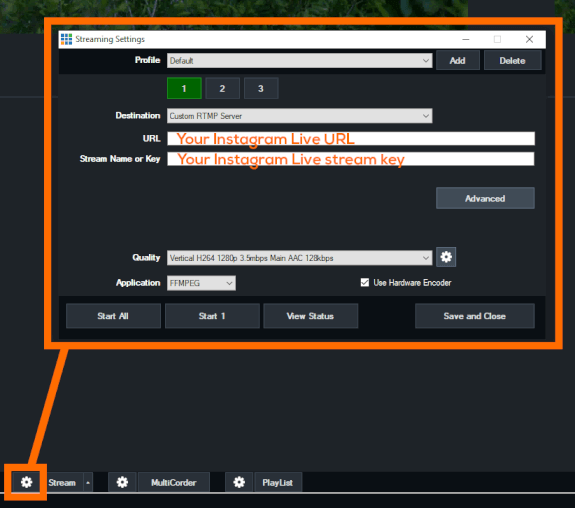
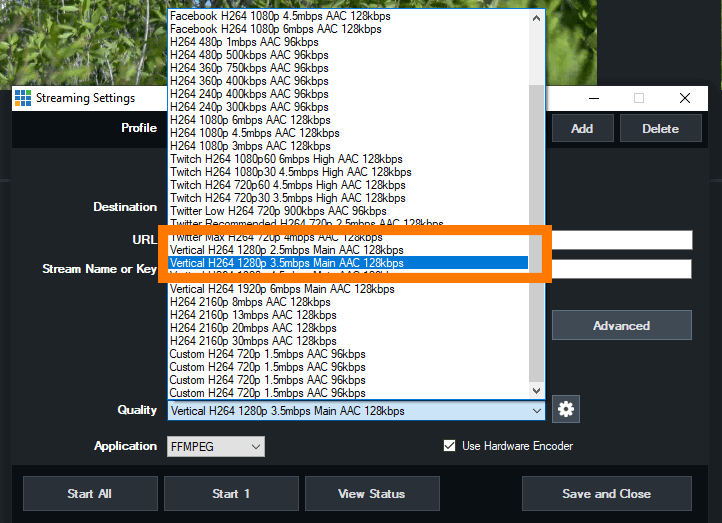
5. Now we can adjust the streaming output to be vertical 1280p
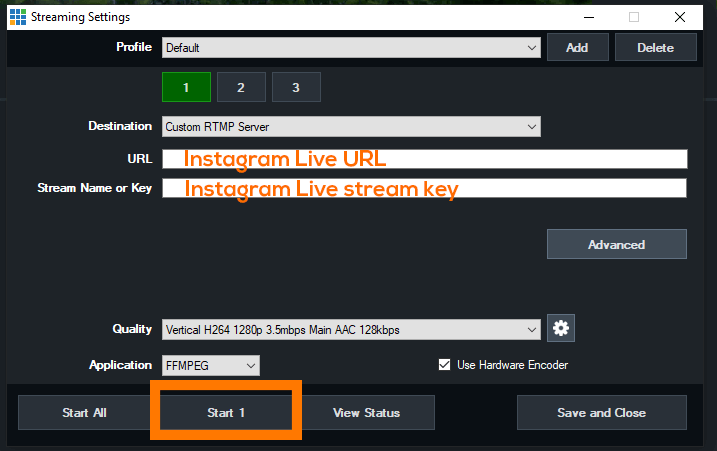
6. Once that’s done we can start streaming, by clicking the Stream button in vMix!
7. Now that we’ve started the stream in vMix, we need to preview it in Instagram Live. Click Go Live to make your stream appear on Instagram. Please note that when you Go Live on Instagram, your viewers will see your stream from the point in which you activated it in vMix!
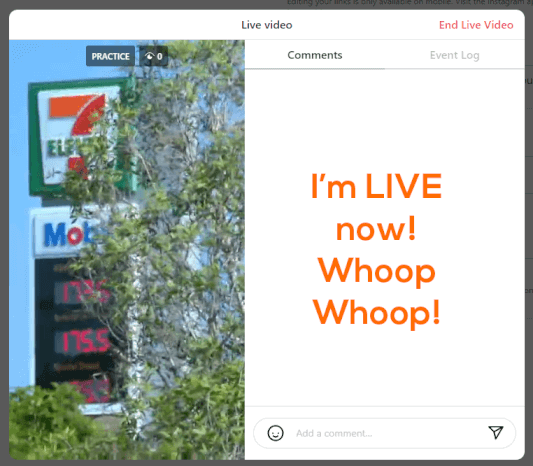
8. We did it! We’re now live streaming to Instagram Live!
Things to consider!!!!!
Recording
Instagram Live doesn’t archive by default, so if you’d like to share your video after it’s done you will need to turn on archiving. This can only be done on a phone! You’ll need to log in, go to the hamburger menu>Settings and privacy>Archiving and downloading. Then turn on Save live to archive. Currently these archives only last for 30 days and can only be downloaded or viewed via a phone.
You might also want to record in vMix so that you have a permanent copy.
Timing
As mentioned before, your stream content starts when you start in vMix. Instagram will spool that video and when you click Go Live, it will start playing. Remember that! You don’t want to accidentally stream something you don’t want.
You’re going to still need a phone!
There are a number of settings and features that can’t be accessed via the website. You’ll still need to have Instagram on your phone to set all of this up and to also access the archive if you need to.
Test Test Test
This is all pretty new to most of us. Instagram Live has been around for a long time on phones, but encoder access has been quite limited. Settings and procedures may change in the future but for now be sure to test it all out with your workflow.